Before you talk to a designer, buy furniture or plan a renovation, it helps to draw what you already have. For that you need three simple things: a tape measure long enough for the room, a straight ruler for drawing to scale, and tracing paper so you can try different layouts over the same base plan.
None of these tools needs to be expensive. What matters is that the markings are clear, that the ruler is straight and long enough for the size of paper you use, and that you choose metric or imperial units and stick with them for the whole drawing.
This guide explains what to look for in each tool and how to use them together to produce a simple measured sketch of a room.
Metric, imperial or both
In Canada you will meet both systems. Building products, lumber and many tape measures still use feet and inches, while a lot of drawings, furniture dimensions and imported tools use millimetres and centimetres. Many tools carry both scales, which is useful, but it also makes it easy to read the wrong edge.
A few practical rules:
- Pick one system per drawing. Mixing inches and centimetres on one plan is the most common source of mistakes.
- Write the unit on the drawing, for example “all dimensions in mm”.
- Check product dimensions in the same unit you used for the room before you order furniture.
Choosing a ruler: steel or plastic
| Ruler | Good for | Things to know |
|---|---|---|
| Steel, 30 cm | Desk work, cutting along an edge | Durable, will not nick under a craft knife |
| Steel, 45 to 60 cm | Larger sheets, long straight lines | Heavier, stays put on the paper |
| Plastic, 15 to 30 cm | Everyday drawing, seeing the paper below | Light and cheap, edges can be damaged by blades |
| Flexible plastic | Curved surfaces, portability | Not ideal as a cutting edge |
| Combination or angle square | Checking right angles, marking lines | More a workshop tool than a drawing tool |
A steel ruler is the better choice if you also cut card or paper, because a blade will gouge a plastic edge. The Staedtler 600 mm steel ruler has metric and imperial markings and a cork backing that lifts the edge slightly off the paper, which helps avoid smudges when you draw with ink. You will find shorter and longer options in the steel ruler range.
A clear plastic ruler lets you see the lines underneath, which is handy when you draw parallel lines or line up details. The Westcott 30 cm flexible ruler has bevelled edges and both metric and 1/16 inch markings. Browse more in the plastic ruler range.
Choosing a tape measure
For rooms, a retractable steel tape is the most practical tool. Look at:
- Length. A 5 m or 16 ft tape covers most single rooms. A 7.5 m to 10 m tape lets you measure a long wall or an open-plan space without moving the tape and adding errors.
- Blade width. Wider blades, around 25 mm, stay rigid further when you extend them across a gap, which makes measuring a ceiling or a long wall alone much easier.
- Hook. The hook at the end should move slightly. That movement makes up for its own thickness, so readings are accurate whether you hook it over an edge or push it against a wall. A magnetic hook can grip steel door frames and studs.
- Lock. A good lock holds the blade so you can read and note the figure.
- Scale. Decide whether you want metric only, imperial only or both.
The 10 m tape with magnetic hook has a 25 mm blade and covers larger rooms. More tapes and related tools are in the measure tape and measurement sections.
Using tracing paper to test layouts
Tracing paper is thin, translucent paper that lets you see a drawing placed underneath. Designers use it to try ideas quickly without redrawing the base plan each time. You draw the room once, carefully, then lay a sheet of tracing paper on top and sketch a furniture layout. If you do not like it, take a fresh sheet and try again.
Tips for working with it:
- Tape the base plan to the table with low-tack tape so it does not move.
- Use a soft pencil or fine felt-tip; hard pencils can tear thin sheets.
- Label each sheet with the option number and date.
- Keep the sheets flat; tracing paper curls in damp air.
A small tracing paper pad is enough for room plans on A4 or letter size paper. The tracing paper category lists the options, and you will also find drawing tablets in the writing tablet section if you prefer to sketch digitally.
Drawing a room to scale, step by step
- Sketch the shape first. Walk round the room and draw a rough outline, including doors, windows, radiators and sockets.
- Measure each wall at about waist height, and write the figure on the rough sketch. Measure the diagonals too: if they are equal, the room is close to square.
- Measure openings. Note the width of doors and windows and their distance from the corners. Note which way doors swing.
- Choose a scale. Common scales for room plans are 1:50 (2 cm on paper equals 1 m) and 1:20 for small rooms. In imperial, 1/4 inch to 1 foot is a common choice.
- Draw the plan with your ruler on good paper, using the measurements, not the rough sketch.
- Lay tracing paper on top and try furniture layouts. Cut paper shapes of furniture to the same scale if you want to move them around.
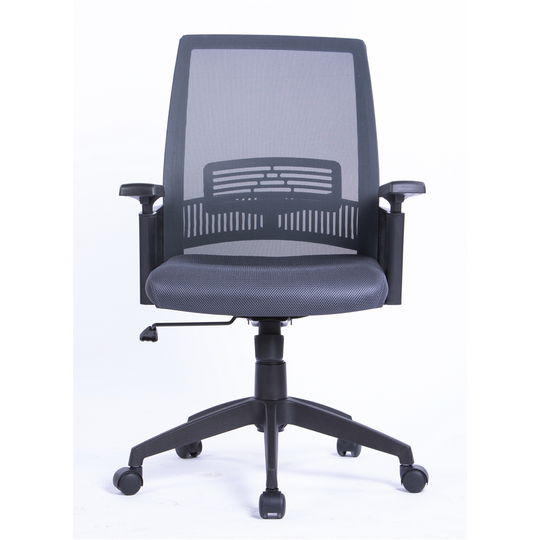
A measured plan like this is useful whatever comes next, whether you are choosing a desk and chair, as covered in the guide to choosing an office chair, or preparing for a meeting about a larger project.
Quick checklist
- One unit system for the whole drawing, written on the plan.
- Tape measure long enough for your largest wall, with a lock and a sliding hook.
- Steel ruler if you cut; clear plastic ruler for everyday drawing.
- Ruler at least as long as the longest line on your paper.
- Tracing paper and low-tack tape for testing layouts.
- Diagonals measured to check whether the room is square.
- Doors, windows, radiators and sockets marked.
Common questions
Which scale should I use for a room plan?
For a typical room, 1:50 fits comfortably on letter or A4 paper and leaves space for notes. For a small bathroom or a single wall of shelving, 1:20 shows more detail. In imperial, 1/4 inch to 1 foot is close to 1:50.
Why are my measurements different each time?
Usually because the tape was not straight, it sagged across the room, or it was read from a different edge. Measure at the same height each time, keep the tape taut and level, and read from the same side.
Can I use a cloth tape instead of a steel one?
A soft tape is fine for curved objects, cushions or fabric, but it can stretch and sag. For walls and floors, a rigid steel tape gives more reliable figures.